Servicing Automatic Pool Covers
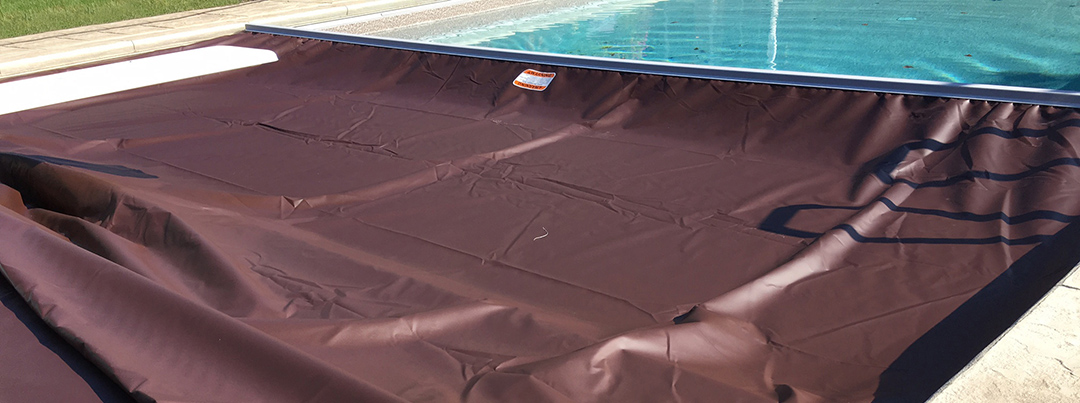
In general, automatic pool covers are quite reliable. However, as with any piece of equipment, the system requires maintenance at some point. Some of these maintenance issues are foreseeable — small wear and tear or general upkeep issues, for example. Other issues, however, are unexpected. This unanticipated service can fall under two categories, electrical or mechanical.
Most service requests from pool cover owners amount to, “My cover doesn’t work, please come over and fix it.” Obviously, this type of call doesn’t provide much insight into the problem or help diagnose the issue. Service professionals must take it upon themselves to do a thorough on-site assessment at the job site to identify the problem and provide solutions, likely without much help from the pool owner.
Step one: Evaluating the pool cover site
Every service request must start off with a five- to 10-minute evaluation of the entire pool cover site. In those early moments, service technicians should focus less on hurriedly getting the problem fixed and instead take an investigative approach before handling any equipment. Operating the cover before evaluating the site might cause further damage to the system. More often than not, the quick-fix approach will only address the symptom of the problem, not the underlying cause.
When entering the pool area, technicians should walk around the entire pool cover and perform the following tasks:
- inspect the touch pad or key switch to ensure power is on;
- examine the surface of the pool cover for debris, such as leaves or water;
- check the pool water level to see if it is particularly high or low;
- inspect the pool cover and webbing for signs of deterioration;
- study the housing lid, looking for interference with the vinyl cover;
- examine the tracks and track pulleys for signs of wear and tear and
- check the status of the lead bar (the front edge pulls the cover closed).
After performing this cursory inspection, the technician should notify the homeowner if a problem is noticed above and beyond the customer’s request. Proactive communication with the customer will promote a positive relationship with the client and increase credibility during the time spent at the job site. By following these inspection procedures, technicians will have a much better understanding of the pool cover situation before the real work begins.
Step two: Diagnosing electrical issues
Sometimes the most obvious problem can be answered with the simplest question: Is there power to the pool cover? The quickest way to test for power is to use an electrical tester pen. When held against power cords, it illuminates to indicate if power is present. Not only are these devices handy, they are also affordable; they typically cost less than $10. They are a must have for any service technician. If no power is present, the problem might be solved in the first five minutes — a tripped ground fault interrupter (GFI) circuit breaker.
If this is not the case, the path of power (or reverse path of power) should be followed. The technician should start at the electrical box to see if the breaker is on. If it is, continue to look for power at the next connection, usually a junction box near the motor or controller. Each location should be investigated until the location of the breakdown is found. The ultimate goal of this process is to determine whether the problem is an electrical issue or an electrical component issue, either the controller or motor.
Next, the controller should be gently operated to see if the motor shaft moves in both forward and reverse. If it moves in both directions, but the cover does not, the technician is dealing with a mechanical issue. If this is the case, he or she can skip further electrical diagnosis. If the shaft does not move and the motor still has no activity, it is time to move on to the next step.
Electrical issues are not always the motor or controller components, but can be attributed to wiring and/or connections between these components. These connection locations are usually the most difficult electrical problems to diagnose and repair. When all else fails, all connections at junction boxes and components need to be rewired. If all of these steps have failed, the problem lies within the motor or controller. Of course, since each manufacturer’s product is different, technicians should consult the manufacturer or its manual for repair details.
Step three: Diagnosing mechanical issues
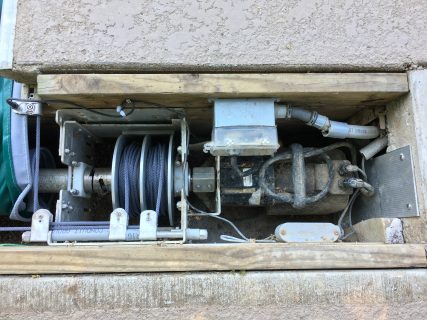
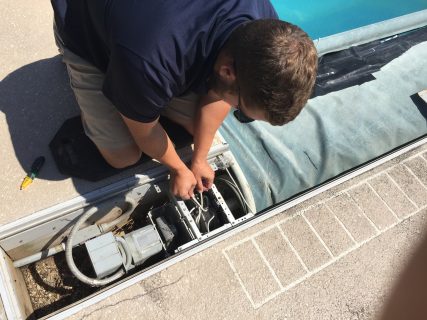
While it is important to remember each manufacturer’s system is unique, these checkpoints are the best starting point for any technician looking for a mechanical issue with an automatic cover. After the housing lid has been removed, the motor end of the drive system needs to be checked using the following steps:
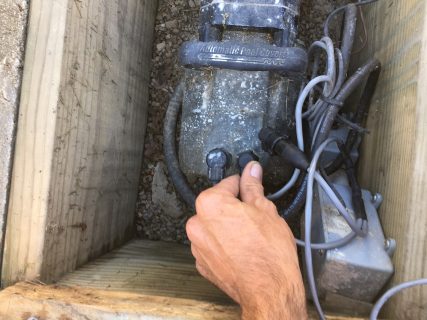
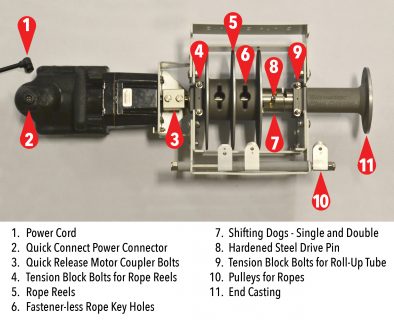
- Check for secure electrical connection to motor. Whether the motor is quick-connected or hard-wired, the connection must be secured.
- Check for broken or loose motor coupler bolts. Broken bolts are an indicator of other problems, not necessarily the main cause of a cover not operating. These bolts are not designed to break, but will fracture if put under an inordinate amount of torque over a prolonged period of time.
- Check for proper tension on rope reel tension blocks. The technician needs to ensure there is enough tension on the rope reels to make turning them by hand somewhat difficult.
- Check for tangled or broken ropes. If ropes are tangled, it is likely due to a lack of tension on the rope reel tension blocks. In this case, the technician must first untangle the ropes and go back to the previous step to prevent a recurrence. The ropes should then be inspected for exterior wear or diameter inconsistency. Ropes should always be .25 inches in diameter. Any part of the rope less than .125 inches in diameter is showing signs of internal wear and should be proactively replaced at this time. If the rope or ropes need to be replaced, the technician should check with the individual manufacturer for replacement instructions, as each has different replacement procedure guidelines.
- Check for a broken drive pin. While some systems have a shear pin, technicians should not confuse this with the present drive pin. Most modern drive pins are made of hardened steel and should not break, but should be checked regardless.
- Check the shifting dogs (or shifting gears) for accurate alignment. If the shifting dogs do not engage each other, the pool cover cannot move. This misalignment is more common on older systems and rare (though still possible) on newer ones. A few common reasons the dogs do not engage are corrosion or a burr on the drive shaft, preventing a complete shift of the double dog from one side to the other. If that is the case, the two motor coupler bolts can be easily removed, allowing the technician to lift the mechanism out of the frame, file or replace the shaft and reinstall the mechanism, all in about five minutes.
- Check for proper tension on the roll-up tube tension blocks. The tension blocks for the rollup tube prevent the tube from free spinning. As with the tension blocks for the rope reel, the roll-up tube should be somewhat difficult to move by hand when the bolts have the proper amount of tension.
- Check for worn pulleys. This can be done manually or by gently activating the controller and observing the effectiveness of the pulleys while the rope passes through them. There are typically six pulleys on every pool cover system. Three are located on the motor side of the drive system; one is located at the end of the tube, on the side opposite the motor; and two are located at the end of the tracks (one per track side). The two track pulleys are not easily seen and often overlooked by inexperienced service technicians. A great pool cover service technician must inspect these track pulleys and change them every five to seven years.
Additional inspection items
If present, the torque limiter should also be checked. Newer systems have electronic torque limiters (ETL) that do not require lid removal to make an adjustment; they are easily adjusted from a touch pad. Mechanical torque limit (MTL) systems require torque adjustments over the life of the system. Some of these MTL systems can be adjusted under the lid using wrenches.
Technicians should also check for ropes pinched in lid support brackets. With the popularity of stone or concrete lids, this inspection step is becoming much harder to perform, due to the added weight of these materials. Companies should keep this in mind when they install stone or concrete lids.
The frame, rope reels and end casting should also be checked for corrosion, particularly as salt generators become increasingly popular in the pool industry. Newer automatic cover drive components are anodized or made from stainless steel to prevent wear, but older systems may not be protected. If white material is present on drive components, all components should have corrosion removed before reinstallation.
Finally, technicians should check for debris inside the roll-up housing, which can cause interference with the vinyl. Occasionally, the strangest items find their way into cover housings. Experienced technicians tell stories of everything from swim noodles, skimmer lids and bathing suits, to raccoons, snakes and other assorted wildlife. These items will cause the cover to bind up while trying to open, so technicians need to keep their eyes open and stay vigilant.
A thorough approach
By spending five to 10 minutes evaluating the entire pool area and methodically following the proper diagnostic steps, a pool cover technician’s time on-site can be more efficient and effective. Of course, all this is moot if he or she does not communicate well with the customer. If any major components need to be repaired or replaced, technicians need to explain the problem and present the pool owner with options. Then, once a course of action has been decided upon and repairs have been completed, the technician must communicate one more time, to make sure the owner knows what has been accomplished and answer all of their questions. That’s what turns a good service call into a great customer experience.
