Beyond Tradition
The Orenda Startup takes a proactive approach to water balance
When filling a new pool, it’s crucial to act promptly, but there are differing opinions on the best approach. There’s the National Plasterers Council-endorsed method, the hot start method (the pool is filled with very aggressive water to burn off plaster dust) and the calcium-based startup, which is often referred to as The Orenda Startup.
Specialty chemical manufacturer Orenda Technologies’ method uses calcium to rapidly balance the water slightly on the positive side (+0.20 to +0.30 LSI), which is why Eric Knight, director of sales and marketing at Orenda, considers the method an LSI-based startup rather than a calcium-based startup. The Langelier Saturation Index is a measurement of water balance as defined by calcium carbonate saturation that determines if water is aggressive/corrosive (low LSI), balanced or scale-forming (high LSI).
Though gaining popularity, the method has been around since 2017. Knight credits Lupe Mariscal from Blue Moon Pools in San Diego as the pioneer of the concept. Mariscal’s technique involved adding calcium while filling the pool, significantly reducing plaster dust, which Knight says was a “novel concept” at the time.
One of the main differences in the Orenda Startup is the shift from reactive to proactive thinking, Knight says.
“We don’t want to wait for the water to balance itself by eating plaster,” he says. “We found that it’s really about the LSI, not about an individual set of factors, so we try to get the LSI slightly positive in the first few days so that water doesn’t have the physical ability to steal anything from cement.” When water pulls soluble calcium from cement — in a new pool surface, calcium hydroxide is the most soluble available form — it leads to plaster dust formation, a spiked pH and permanent damage to the surface, among other potential issues. Perfectly LSI-balanced water can still dissolve calcium hydroxide, which is why the Orenda method calls for a slightly positive LSI.
In another vigilant move shared in a video interview with Knight, Mariscal recommends always testing the water coming out of the tap before filling the pool to understand exactly what you are dealing with. “It’s very important to check; for me, it has solved more than 80% of the future problems in a plaster,” Mariscal says. In fact, testing fill water is highly recommended by every startup method.
Mariscal also begins adding calcium before the pool is full — if the water chemistry requires it — adding a pound or two once it reaches the 300-gallon mark.
Although Orenda’s method may balk tradition, it’s important to approach startups with a new mindset, Knight says.
“We have been conditioned to focus on where the water is, and that’s a mistake because the water will move,” he says. “We not only want to know where the water is when we test it, and we not only want to know where it is when we set it, we want to know where it’s going. And when we start thinking like that, we start being more proactive. We start making better decisions about what we can do with our water.”
Focusing on “where the water is going” is especially important in colder climates and seasons as most plaster damage that occurs after the startup happens in colder months, Knight says. Adjusting calcium hardness helps insulate and maintain a balanced LSI.
The Orenda Startup method has been adopted across the country, extending beyond concrete pools to a related, LSI-focused method for fiberglass and vinyl pools. Orenda supports professionals with guides, videos and a training academy on its website to help them learn about the startup method.
Orenda Startup Instructions
Setup
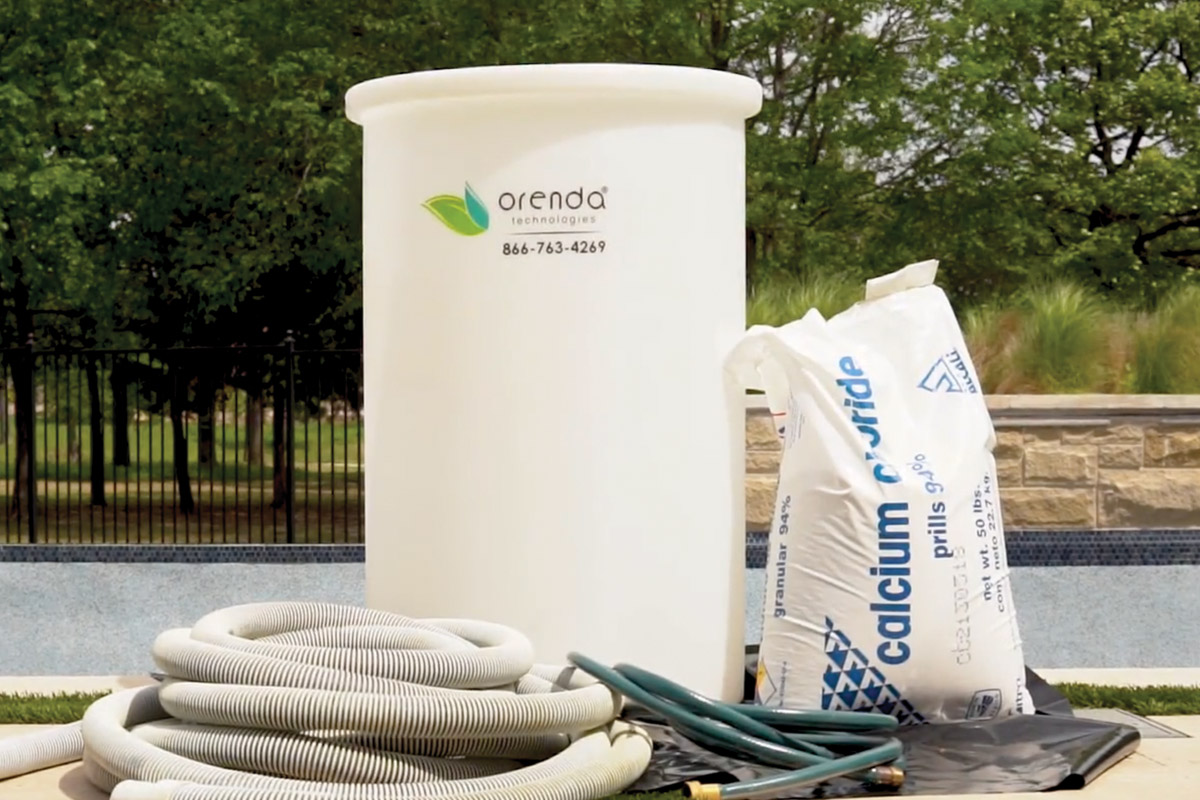
- Bring equipment to the job site. If using the Orenda Startup Barrel, place a plastic tarp down and assemble the barrel on the edge of the pool at the deep end.
- Hook up as many hoses as available that will fill the pool. Connect one hose to the influent spigot. Connect the hoses as demonstrated in the startup video.
- Connect a clean vacuum hose to the 1.5-inch barbed fitting (barrel overflow) and secure with a 2-inch hose clamp (vacuum hose and clamp not included).
- Once the hoses are connected, turn on one hose to fill the barrel to about 6 inches below the overflow hole (to the vacuum hose), and shut off the water.
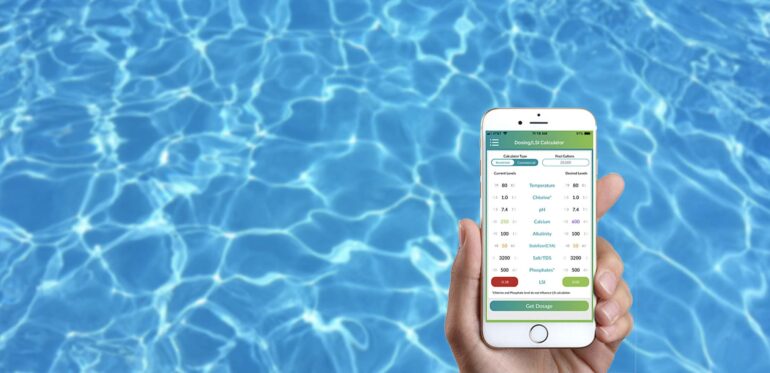
- Test the tap water chemistry in the barrel if tap water has not yet been tested. Use the Orenda Calculator and adjust the parameters on the right side of the calculator to achieve the desired LSI target. The Orenda Calculator also gives you chemical dosing so you can achieve recommended levels for calcium and alkalinity within that required LSI target:
- LSI value of +0.20 to +0.30 (ideal), maximum of +0.49
- Target a minimum of 300 ppm calcium (unless tap water is over 70ºF, then a minimum of 260 ppm).
- The Orenda App will prescribe the amount of calcium chloride and muriatic acid necessary for the startup. If you need to increase alkalinity, it will prescribe sodium bicarb (Note: never add sodium bicarb and calcium chloride together). Be sure you have enough of these chemicals on site before proceeding.
- Connect all fill hoses together and tie them together with the vacuum hose that will have the pre-treated water. Wrap a fabric cloth around all hoses and tape securely. Finally, tape an empty bottle to these hoses as a float.
You are now set up and ready to add chemicals. Note: Orenda recommends waiting a few hours after the plastering is completed to let it harden more before turning the water on.
Filling the pool
- Pre-dissolve the prescribed amount of calcium chloride in the Orenda Startup Barrel or 5-gallon buckets. If using buckets, aim for no more than 15 pounds of calcium chloride per 5-gallon bucket.
- Add half a quart (16 fl. oz.) to a full quart (32 fl. oz.) of SC-1000 to the barrel. If using buckets, split the dose evenly amongst buckets.
- Add 12 fl. oz. of 31.45% muriatic acid per quart (32 fl. oz.) of SC-1000 to neutralize its pH in the barrel or in between the buckets.
- If tap water pH is above 7.8, measure and add additional muriatic acid as prescribed by the Orenda App to get the pH below 7.8. This acid is in addition to the 12 fl. oz./32 fl. oz. of SC-1000 prescribed in step above. If more than 64 fl. oz. of acid is required, divide the acid over a few hours during fill up.
- Stir the calcium solution until completely dissolved. The water should be clear to the bottom of the barrel and cooled down prior to proceeding.
- After the plaster has had a few hours to dry and harden, water can then be turned on to begin filling the pool.
- Turn on all hoses to fill the pool. The dedicated hose to the Orenda Startup Barrel should be a gentle, steady flow of water, which will overflow the calcium-rich water into the pool. Do not turn the hose on full blast through the barrel.
- Once the water begins flowing into the pool, pour the entire startup dose of SC-1000 (minus what you have just added to the barrel or buckets) into the pool. This can be added via a funnel down the vacuum hose of the barrel into the pool, or alternatively, you can add SC-1000 directly to the main drain if wearing the appropriate sponge footwear. The entire SC-1000 purge dose should be applied before there are 3 inches of water in the pool.
- Ensure all hose connections on the Orenda Startup Barrel are sealed and working properly before leaving.
Filling the spa (if applicable)
- Fill the spa with water before filling the pool. Put a hose with a cloth taped on the end into the spa to begin filling.
- Add 8-12 fl. oz. of Orenda SC-1000 to the spa (and catch basins/troughs if the pool has a vanishing edge).
- Dissolve 2 pounds of calcium chloride in a bucket with one tablespoon of SC-1000. Stir until clear and cooled down. Then pour into the spa as it is filling (the earlier, the better).
- Gently brush the spa to stir in the solution (without spilling the water over the spillway if there is one).
Day 1: Once the pool is full of water
- Fire up the equipment and begin circulation.
- Brush the entire pool and spa to get any residual dirt/debris off the surface. If the startup was done correctly, there should be no plaster dust, but there can still be dirt and debris from construction.
- Check water chemistry (after you brush vacuum). Input test results in the Orenda LSI Calculator App. Keep LSI between +0.20 and +0.49.
- If the pH is high (8.0 or above), lower the pH to just below 7.8 (about 7.6-7.8). Use the Orenda App to get the correct dosage needed, measure the acid with a measuring cup and pre-dilute it in a bucket of water. Then pour the pre-diluted acid around the perimeter of the pool and brush. Never pour acid directly into the pool.
- Add the purge dose of CV-600 enzymes (32 fl. Oz./10,000 gallons) into the skimmer or around the perimeter.
- Adjust alkalinity by adding sodium bicarbonate as needed. Adjust pH to about 7.6-7.8.
- Do not add salt for 30 days. Do not add chlorine until Day 3, and cyanuric acid (CYA) until Day 5.
Days 2-4
- Check chemical levels. Maintain an LSI between +0.20 and +0.49.
- Add nonstabilized chlorine on Day 3, no more than 3-5 ppm.
- Brush the pool and spa thoroughly before leaving.
Day 5
- Test water chemistry and adjust the LSI down to +0.00 to +0.30 using the Orenda LSI Calculator App.
- Brush the pool and brush vacuum (not a wheeled vacuum).
- Add up to 30 ppm of CYA. Instruct pool owner to keep CYA level below 50 ppm to avoid overstabilization.
- The pool should be ready for the homeowner to take over at this point.
Day 30
- Add salt as necessary.
- Install a wheeled vacuum cleaner if applicable.

